Table of Contents
Capturing the Beauty of the Full Waterfall
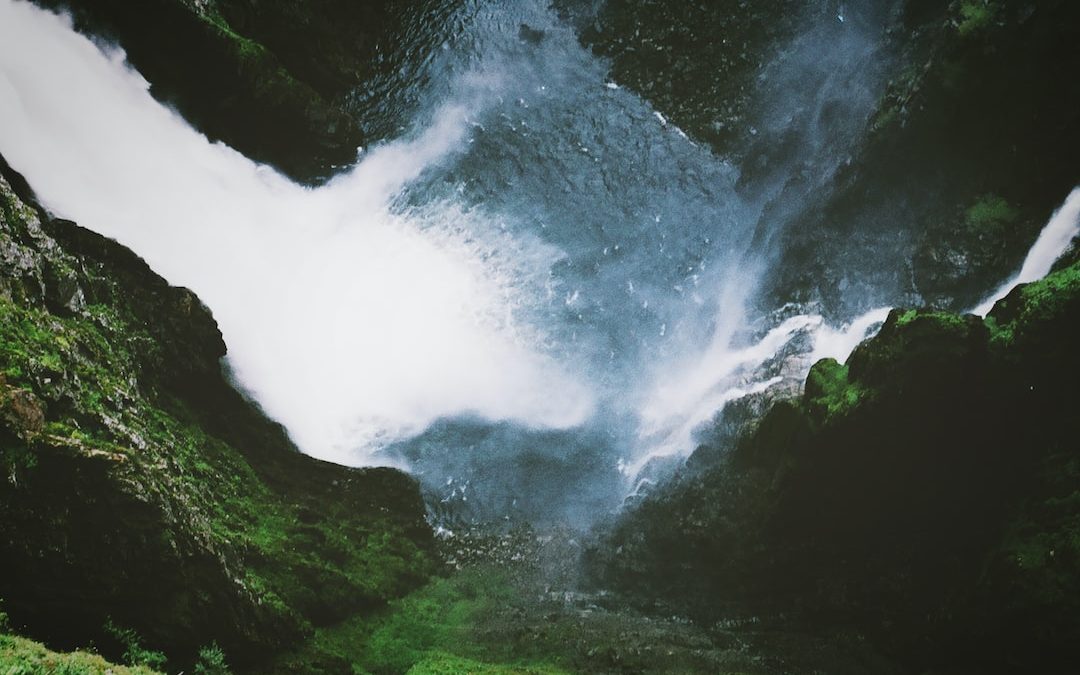
The sight of a full waterfall can leave you in awe and admiration. The power, beauty, and grandeur of a waterfall can take your breath away. While it is one of nature’s most spectacular phenomena, capturing its beauty in pictures can be challenging. There are a few key techniques and tips to keep in mind when attempting to capture the glory of a full waterfall and create an image that will stand the test of time.
Finding the Right Location
The most important step to getting the perfect waterfall shot is finding the right spot. The ideal location to take a picture of a waterfall is close enough to capture all of its beauty, yet far enough away to be able to take in the entire picture. If you’re too close, you can end up with an image that’s too focused on the spray of the water, while if you’re too far away, you might miss the power of the fall.
It is also important to think about the time of day when looking for a location. Early morning and late afternoon are the best times for taking pictures of a waterfall, as the light is softer and the colors will be more vibrant. On a cloudy day, the water will be darker, which can add a sense of drama to the image, while on a bright sunny day the water will sparkle, creating a more cheerful image.
Finally, it’s important to be aware of the surroundings and make sure the background of the shot is aesthetically pleasing. Look for foliage, rocks, and other interesting elements that can add depth and texture to the image.
Choosing the Right Camera Settings
Once you have found the perfect spot, it is time to set up your camera. For waterfall shots, it is best to use a wide angle lens and set the aperture to f/8 or higher to get the best depth of field and capture the most detail. This will also help to keep the whole scene in focus.
In addition, you should use a shutter speed of 1/4 to 1/15 second to blur the movement of the water and create a silky effect. This will add a sense of movement and life to the image that will really draw the viewer in. If you want to capture the spray of the water, a faster shutter speed of 1/60 to 1/125 second is recommended to freeze the action.
Finally, it is important to set the ISO to a low setting to prevent noise and grain in the image. A lower ISO will also help to capture more detail in the shadows and highlights.
Using the Right Accessories
Using the right accessories can make a huge difference when it comes to capturing the beauty of a full waterfall. A tripod is essential for taking sharp pictures, as it will help to keep the camera steady and reduce camera shake. A remote shutter release or a cable release can also be useful for taking long exposures without having to touch the camera.
Another useful accessory is a neutral density (ND) filter, which will reduce the amount of light entering the lens and allow for longer exposure times. This will blur the movement of the water even more and create a dreamy effect. A polarizing filter can also be used to reduce glare and increase the saturation and contrast of the image.
Experimenting with Light and Shadow
Light and shadow are an important part of any landscape photography, and this is especially true when it comes to waterfall photography. The light and shadows can help to create a sense of depth and texture, adding drama and interest to the image. It is important to pay attention to the direction of the light and the shadows in order to make the most of them.
Using backlighting can be a great way to add drama and mystery to a waterfall shot. This is when the light is coming from behind the waterfall and illuminating the mist and spray. This can create a beautiful halo effect around the waterfall and add an ethereal quality to the image.
Front lighting can also be used to create interesting effects. This is when the light is coming from the front of the waterfall and illuminating the rocks and foliage around it. This can create interesting shadows and help to really bring the scene to life.
Experimenting with Different Angles
The angle at which you take the picture can have a huge impact on the final image. It is important to experiment with different angles and perspectives in order to capture the best possible shot. Taking a picture from a high angle can give the viewer a sense of looking down on the waterfall, while a low angle can make the waterfall look more powerful.
It can also be a good idea to try and capture the motion of the waterfall. This can be done by taking a picture at an angle that shows the water cascading down the rocks. This will give the image a sense of movement and energy that can really draw the viewer in.
Using Long Exposures
Long exposures can be a great way to capture the beauty of a full waterfall. This technique involves using a slow shutter speed to capture the movement of the water over a period of time. This will blur the water and create a soft, dreamy effect that can really bring the image to life.
It is important to use a tripod when taking long exposures, as this will keep the camera steady and reduce camera shake. A shutter release or cable release can also be used to reduce the risk of blur. Finally, a neutral density filter can be used to reduce the amount of light entering the lens, allowing for longer exposure times.
Using HDR Techniques
High Dynamic Range (HDR) photography is a great way to capture the beauty of a full waterfall. This technique involves taking multiple pictures of the same scene at different exposures and then combining them into one image. This will help to capture all of the details and tones in the scene, from the lightest highlights to the darkest shadows.
It is important to use a tripod when taking HDR shots, as this will ensure the images are aligned correctly. It is also important to use the same exposure settings for each picture to ensure a consistent look. Finally, it is important to use a low ISO to avoid noise and grain in the image.
Editing the Image
Once you have taken your picture, it is time to edit it. This is where you can really bring out the beauty of the waterfall and create an image that will stand the test of time. Editing can involve anything from basic adjustments such as cropping and exposure to more complex techniques such as color grading and adding texture.
It is important to be mindful of the editing process, as too much can ruin the image. It is best to start with subtle adjustments and then build up from there. This will help to keep the image natural and true to life.
Summary
Capturing the beauty of a full waterfall can be a challenging yet rewarding experience. By following these tips and techniques, you can create images that will stand the test of time and capture the grandeur of nature. Find the right location, choose the right camera settings, use the right accessories, experiment with light and shadow, try different angles, use long exposures and HDR techniques, and edit the image carefully. Doing all of these things will help you to create stunning waterfall photographs that will take your breath away.

